As some of you may or may not know, I posted some "learn to quilt" kits on my etsy shop before the holidays. The first one sold! So first of all, thanks Stacy! And second of all, here's the tutorial that goes along with the kit.
Congratulations on your first quilt! First, a small disclaimer: the tutorial I've written is how *I* make a quilt. There are many things I do out of habit (for example, stacking the squares once I've laid them out) that are simply personal preference - if you think of a way to do something that's easier for you, do it that way!
Let's start with what's in the kit. You have 30 squares, 12 strips, and one big piece. The good news is, all the dangerous work has been done for you...no sliced fingers here! :-)
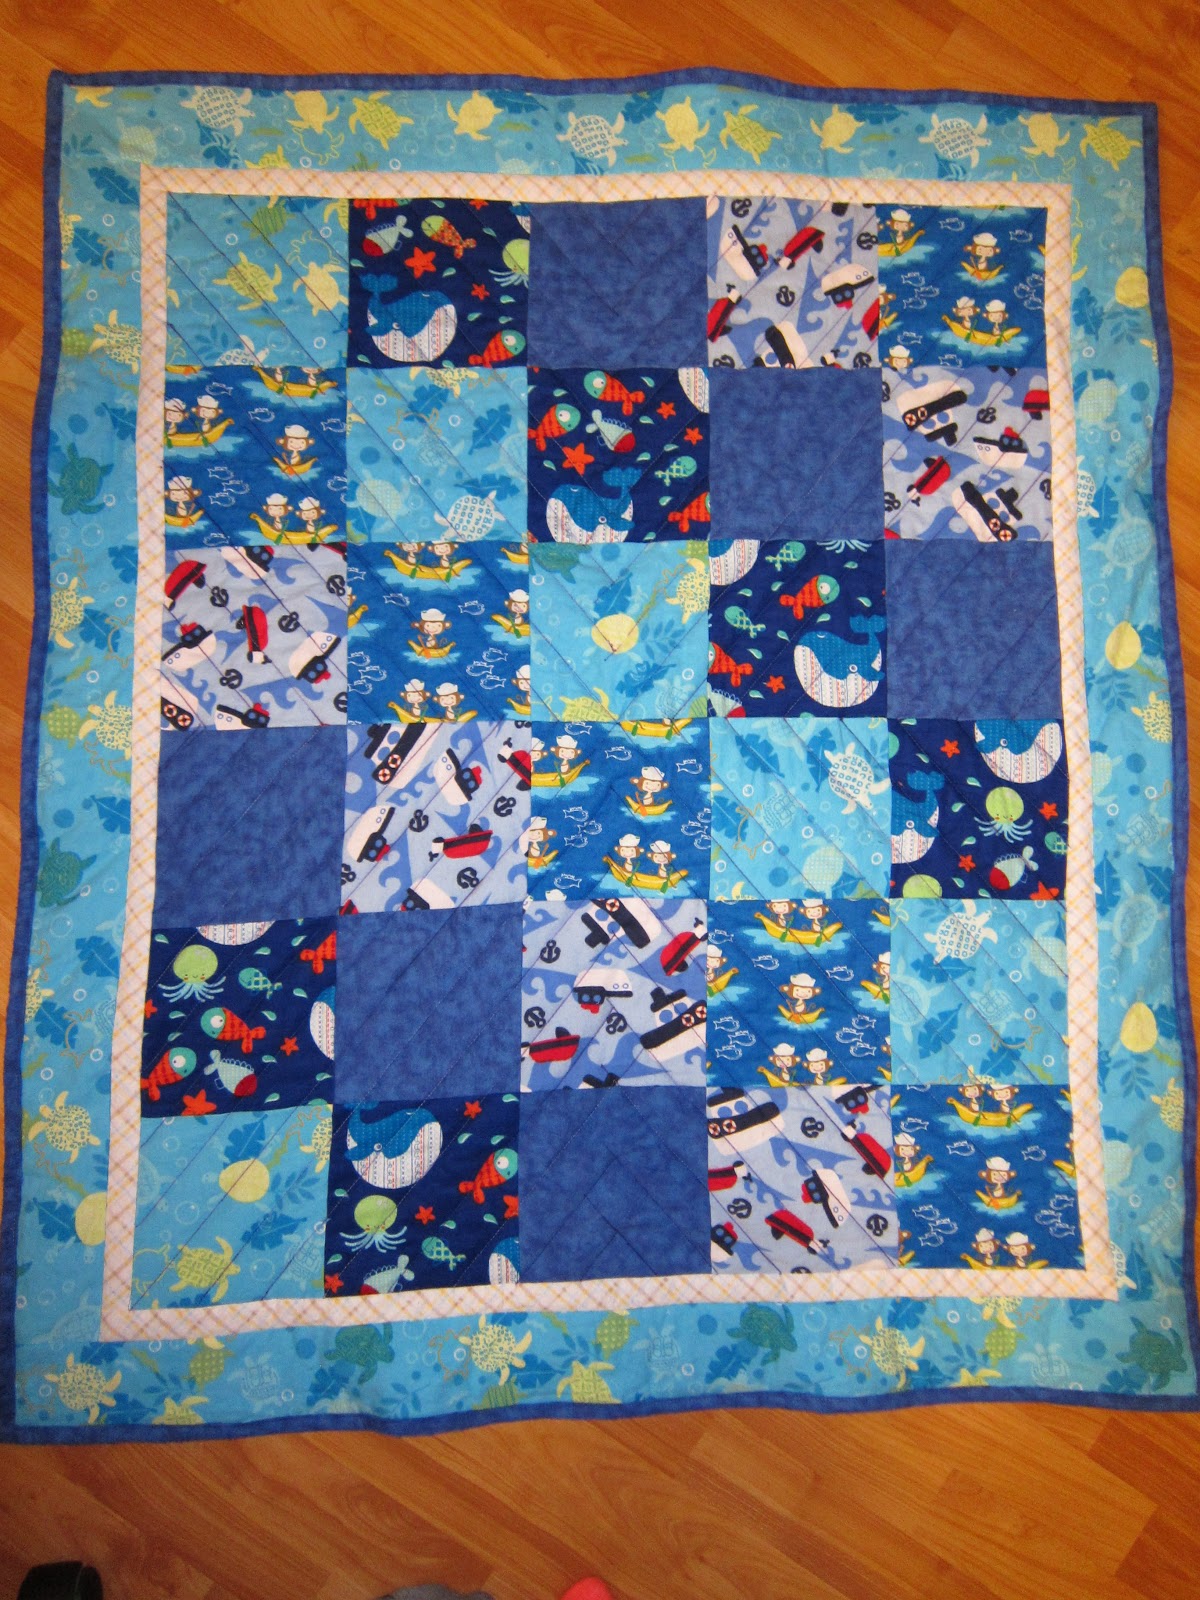
The first step is design. I've laid my quilt out in a simple diagonal pattern, but you can arrange the squares any way you want - random is acceptable! This is YOUR quilt, so make it look how YOU want to see it!
Once you've arranged the squares how you like them, pick them up, starting from the BOTTOM LEFT, putting one square on top of the next until you get to the end of the row. Stack the rows on top of each other, offsetting the corners by 45 degrees each time, like I've done above. This makes it easy to grab a square to sew, without losing your place in the quilt.
Take the first two squares and place them on top of each other, right sides together. ("Right sides" means the "front" of the fabric.) Making sure the SECOND square is on top and the direction of the print (if it has one) is up, pin the squares together along the right side.
 |
| Right sides together, pinned along the right, directional pattern pointing up. |
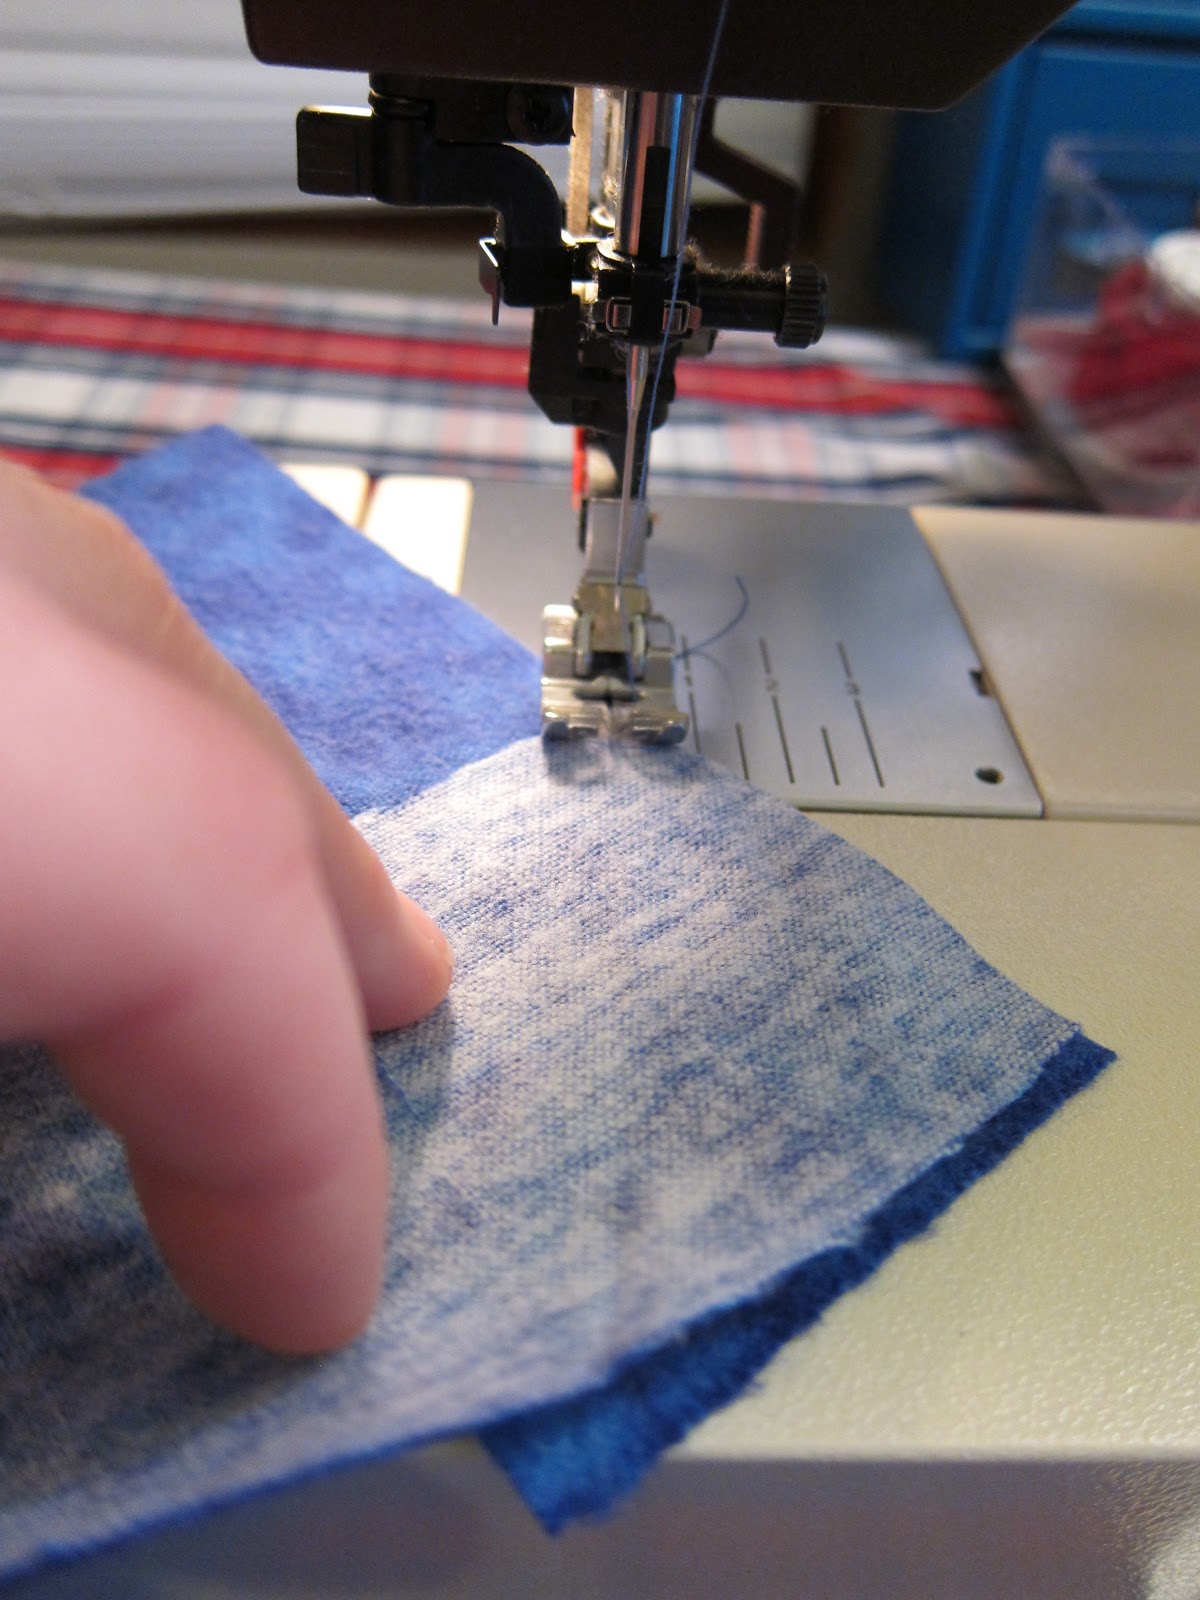
Begin stitching along the RIGHT side, a quarter of an inch from the edge. My machine's foot is a quarter of an inch wide, so I don't mark my fabrics. However, you should make sure you know where 1/4" lives, either by measuring the foot or marking the fabric. Stitch all the way to the end, and cut the thread. Do NOT "tie off" either end - this can cause snagging and isn't necessary to ensure the stitch stays. Just make sure you start stitching slightly before the top of the fabric and finish slightly below the bottom.
Continue this process until you've got a full row completed.
Putting the squares right sides down, press the seam open with your iron on the cotton setting. If the seam won't stay flat, try spraying it with a little water and pressing a little longer.
This is another step where you may find that you prefer something different. Pressing the seams open decreases bulges in the quilt, and is a good habit for when you're sewing a dark fabric to a light fabric. However, pressing the seams to one side or the other is perfectly valid as well. If we're being honest, I sometimes don't bother pressing them at all! Scandalous, I know! :-)
Continue pressing your seams until the whole row is pressed.
Repeat these steps for the other 5 rows.
Once you've got the 6 rows complete, take the top two rows and place them right sides together. Match up each seam so that the seams from each row are as close to lined up as possible. It may be that the blocks themselves don't line up exactly, but make sure the seams line up as shown. Any discrepancies in block length can be accommodated when you're sewing them together (I'll explain that in a minute).
Pin the seams together, to make sure they stay lined up.
Pin all seams together, down the whole row.
Start sewing down the right side, a quarter of an inch from the edge. Remove the pins as you go, waiting until the last minute so the seams stay lined up. If there's a difference in length between two blocks, continue stitching but gently pull the stitched edge to stretch the shorter block. If there's too big a difference, this may not totally take up all the slack. Generally though, you should be able to massage the fabrics into cooperation.
Continue sewing until you finish the row.
Open the rows to see your handiwork!
The corners should line up fairly well if you were diligent about pinning the seams together. Don't worry if they're off by a little bit...that just adds character!
Continue pinning and stitching rows together until you've finished the middle of the quilt. Once you're done, press the seams open as you did with the individual blocks.
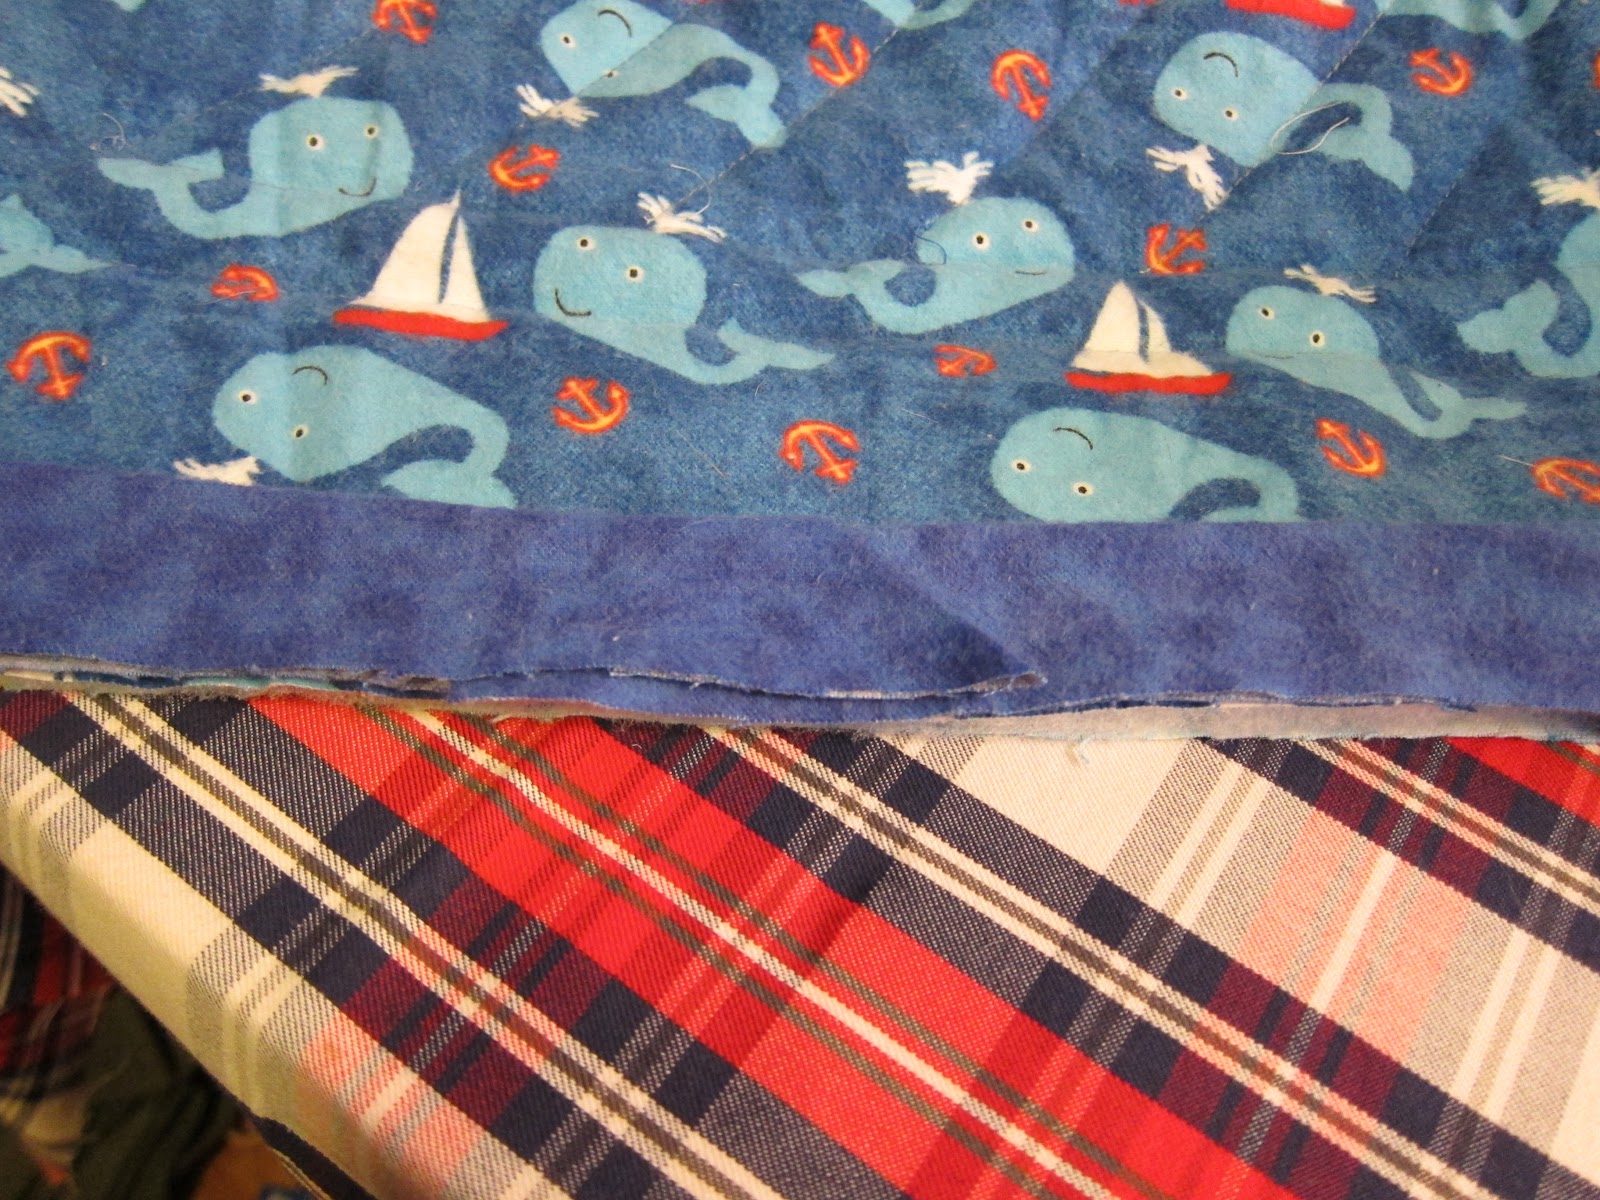
Find your 1.5 inch strips. Iron them flat if needed, then pin to the center of the quilt, starting with the long sides first.
Sew the borders down, starting slightly before and ending slightly after the edges, 1/4 inch from the right side.
Press the seams, either open or flat. I've opted for flat here, but that's just my personal preference.
Continue sewing the borders on, trimming the excess at the end of each strip, until you have all 4 borders on. Make sure you do the two long sides first, then the shorter sides.
Repeat these steps with the 3.5 inch strips, again starting with the long sides.
Press the seams as desired again.
Take a breath and enjoy the fact that the top is done!
Take the large piece of fabric (I've cut it to be 54 inches long and the width will be 42-44 inches wide, depending on the fabric) and smooth it out on the floor. Tape the corners down to keep it from shifting while you work with the other layers.
Spread the batting out over the top of the backing, making sure it lays flat and smooth. For the sample quilt, I used spray on adhesive to keep the layers together, but you can used pins to baste as well. If you don't have them, now is a good time to take a break and go buy some curved basting pins at Joann's.
Lay the top out on the batting, making sure that there's at least an inch around each edge of both backing and batting. Smooth out the top and baste with pins.
When using pins, make sure they're at least every 6 inches (again, personal habit) and that you have a row of them lining the outside, to keep the edges stable.
Once you've basted your quilt, trim the excess batting and backing off, to 1-2 inches larger than the top.
For this quilt, I took a ruler and drew lines across the center of the top, using a Crayola washable marker. You can quilt yours however you like, including simply following the seams (which I'll show in a bit). If you have a pattern in mind, doodle it out so it's easier to trace with your machine. For your first quilt, I'd recommend staying with straight lines.
Draw the pattern on the whole quilt, since it's small. This method may not work as well for larger quilts.
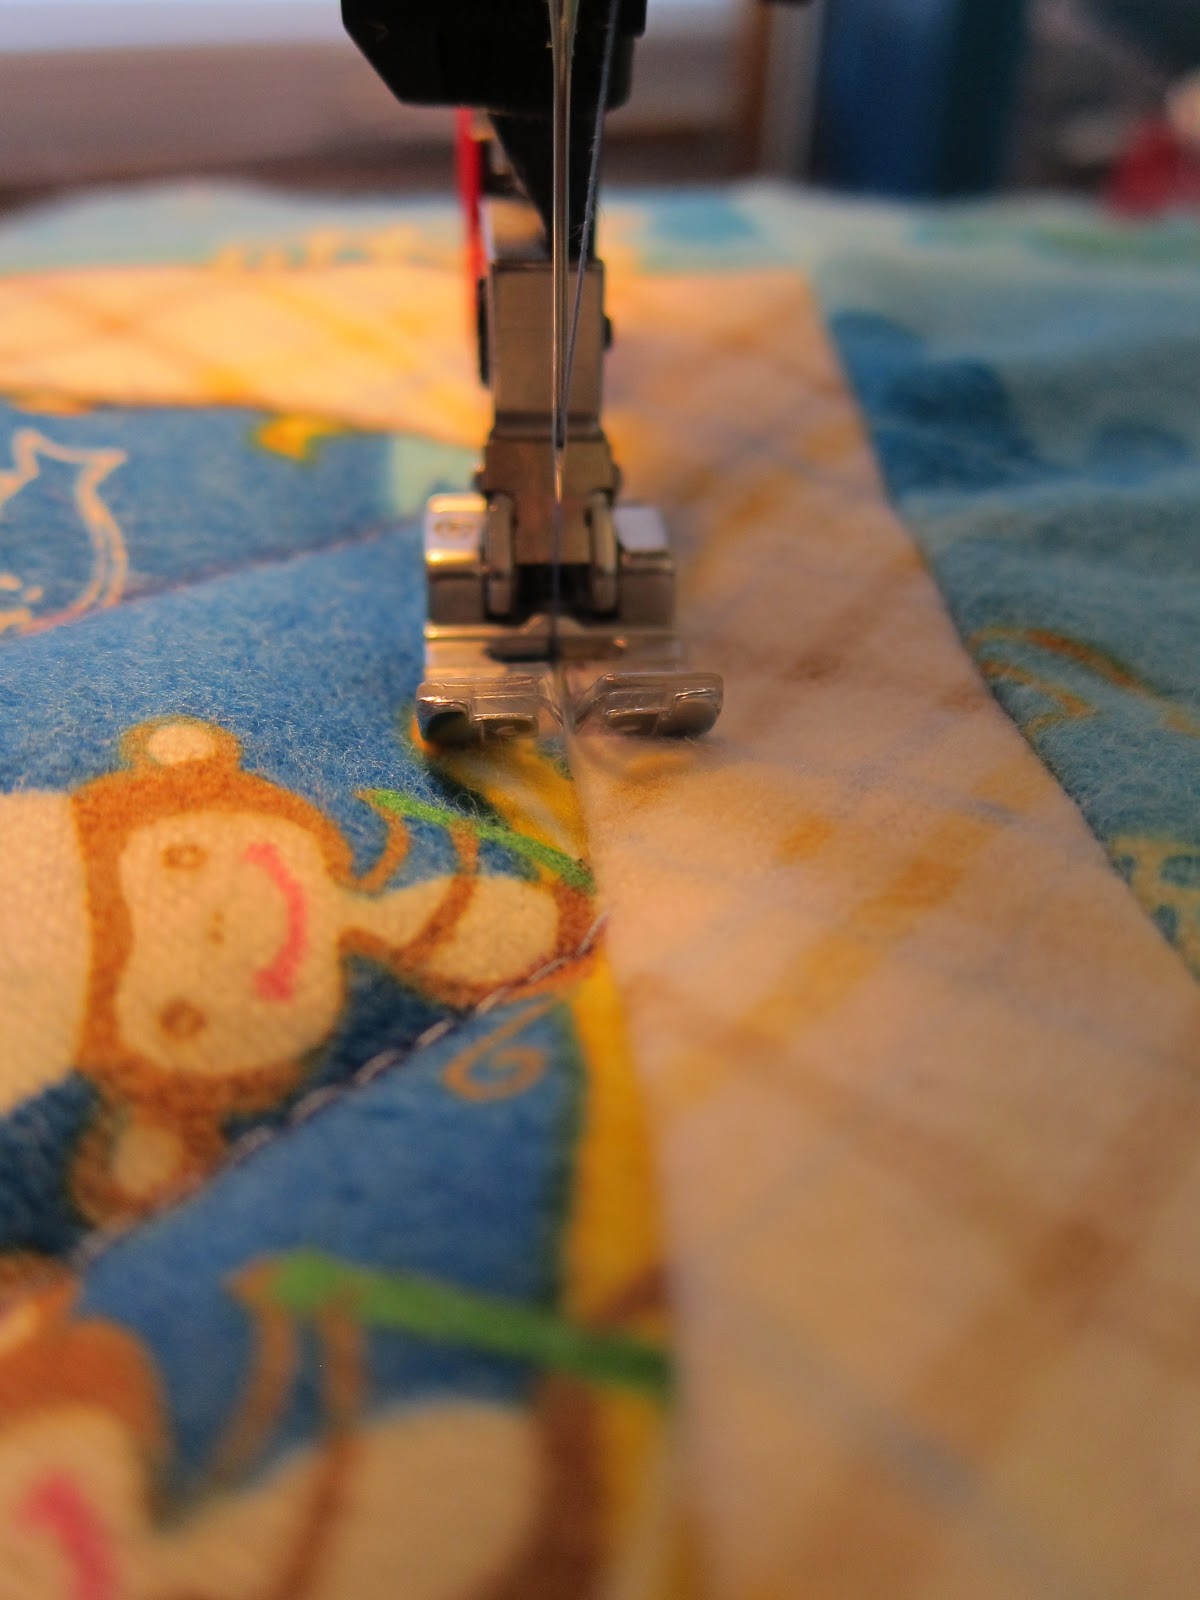
Finally, the actual quilting! Make sure you're sure where the stitch is going to start - this is one time you don't want to go over too much on either end, so position the needle manually if you need to! Once you've found your starting spot, just follow the lines! The general rule is to start from the middle and work your way outward. In this case, I'm starting from the middle line, which starts in the corner. Use your judgement to figure out where to start, but remember that things do tend to shift as you stitch, so middle out is a good place to go from.
For this quilt, I also "stitched in the ditch" for the borders. That means I followed the seam line and tried to get as close to "in" it as possible, for both borders.
You can see the first line on the left, and the second on the right.
Sit back and admire your work!!
Lay the quilt out flat on the floor and, if you're using a rotary cutter, lay a cutting mat under it.
Using a ruler or other straight edge, cut the excess batting and backing off from the edges. Since quilting does shift the fabric a little, you may end up cutting some of the outer border off as well. This isn't the end of the world! Just make sure you're keeping an eye on how wide the border is so it stays relatively uniform the whole way around.
Continue cutting around the rest of the quilt.
Leave the quilt on the floor for your cat to enjoy for a few minutes and grab the 2.5 inch strips from your kit. Put the ends of two of them right-sides together, 90 degrees off from one another as you see above.
Draw a line and sew from one corner to the other.
Cut the excess triangle. Repeat these steps for all 4 strips.
Once your strips are in one long strip, take one end and fold it diagonally as shown. Press it flat.
Fold the strip in half so it becomes 1.25 inches wide and right sides are out.
When you get to seams, press them open.
Continue pressing the strip in half until the end.
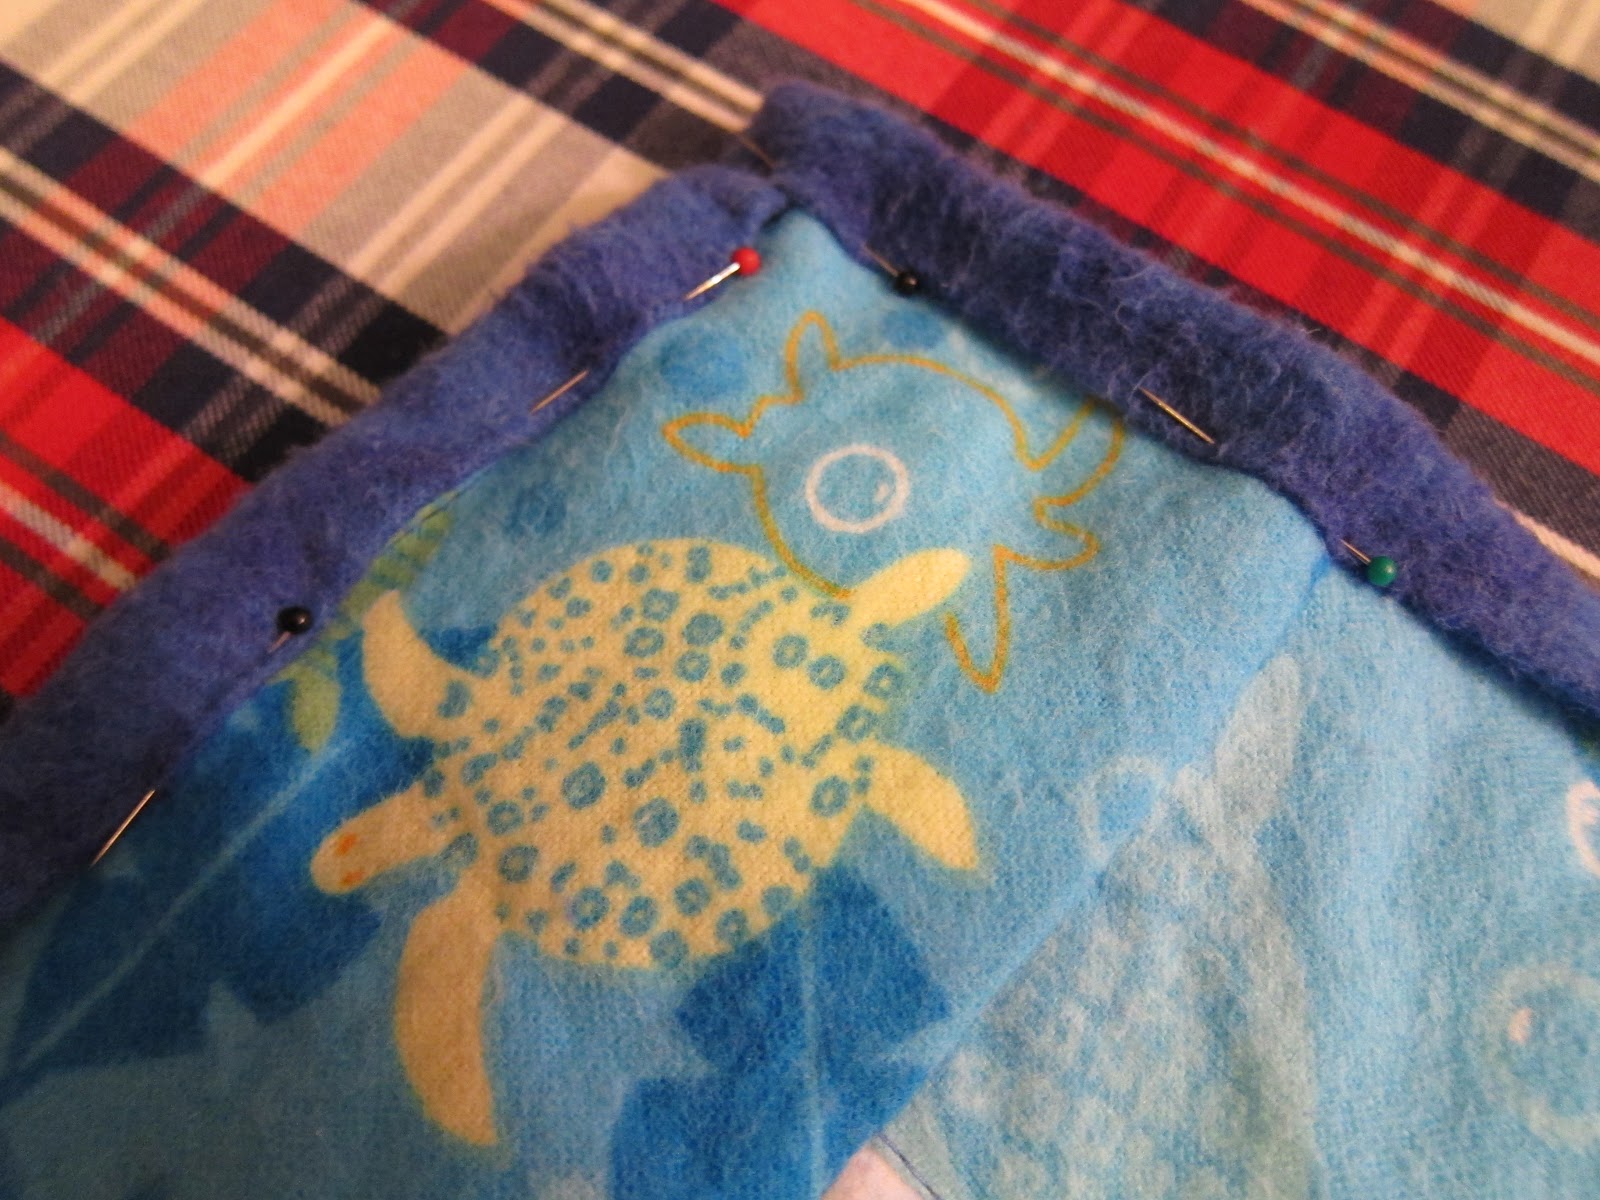
Starting about 10-12 inches from a corner, on the back, start pinning the binding down to
all three layers of the quilt. Use straight pins and pin every 3-4 inches.
When you get to the corner, hold the strip with your thumb, but don't pin it yet.
Fold the strip up (away from the direction of the next side) at a diagonal so it's now running parallel but in the wrong direction to the next side.
Keeping the diagonal fold in place, fold the strip back down toward the next side. The corner should line up and the sides should line up.
Pin on either side of the corner. It should look like this if you pinch that fold up.
Continue these steps all the way around the quilt, pinning frequently. When you get back to the beginning, pin the strip 5-6 inches over the starting point and trim if needed. Before trimming, make sure you verify that the excess more than covers the folded part of the start.
After you've trimmed the end, unpin it (just the end, not the whole thing!) and start sewing about 8 inches from the starting fold. Sew forward a few stitches, back a few stitches, then forward again. Remove pins as you go.
When you get to the corner, unpin about 3-5 inches on the next side. Pull the strip out parallel with the current side, so you can stitch until about 1/4 inch shy of the corner.
Stop sewing and lift the foot but don't cut the thread. Refold the corner as you had before, turn the quilt 90 degrees, and put the foot back down. Keep going!
Keep sewing until you're about 8 inches from the trimmed end of the strip. Sew a little backward then forward again and clip the thread.
Give yourself enough room to work - err on the side of too much room!
Lay the quilt on a flat surface, keeping the unfinished edge as flat and straight as possible. Tuck the trimmed end of the strip into the fold of the diagonally-folded end.
Smooth the ends out and carefully pin the ends together as shown. You should only pin together two layers of fabric here - not all the way through the whole pile!
Once the ends are secured, hold them together and pull them away from the quilt.
Making sure the strip ends are still 90 degrees off from each other, sew down the diagonal seam. As before, cut the thread and the excess triangle. You may want to check to make sure the binding strip lays flat with the quilt before cutting - measure twice, cut once!
When you've cut the excess off, lay the strip back against the quilt and continue sewing it down through the 3 layers of quilt. Once you've gotten back to where you started, backstitch a few stitches and cut the thread. Almost done!!
Flip the quilt over and fold the binding over to cover the raw edges. Pin every couple of inches to keep the binding in place. You can iron this if you'd like, but make sure you don't iron on a cotton setting if you're using polyester batting!
Fold the corners diagonally so they're mitered, then pin the fold.
Pin all the way around the quilt to make life easier while you're stitching the binding down.
This next part is personal choice - I like to machine sew the binding, especially for kids' quilts. However, you can hand-sew the binding using a slip stitch, if you want the final stitches to be invisible.
Starting a couple inches from a corner (any corner, but I usually start on the bottom edge), stitch a few stitches forward then back then forward. Sew as close to the folded edge as possible, but be careful to stay on the binding material.
When you get to the corner, leave the needle down, to use it as a pivot point. You can do this by turning the knob manually. Lift the foot
Turn the quilt 90 degrees, put the foot back down, and keep stitching. Repeat this until you've made it all the way around the quilt.
Write your name on it somewhere and go snuggle up!!
If you've used markers to draw a pattern, wash your quilt on the gentle cycle and lay flat to dry.